Automatic Hydroponic Window Garden
I was inspired for this project by Britta Riley's TED talk titled Britta Riley: A garden in my apartment. In this talk she discusses the struggles of trying to grow a garden with limited space in urban cities.
The premise of the efficiency is as follows.
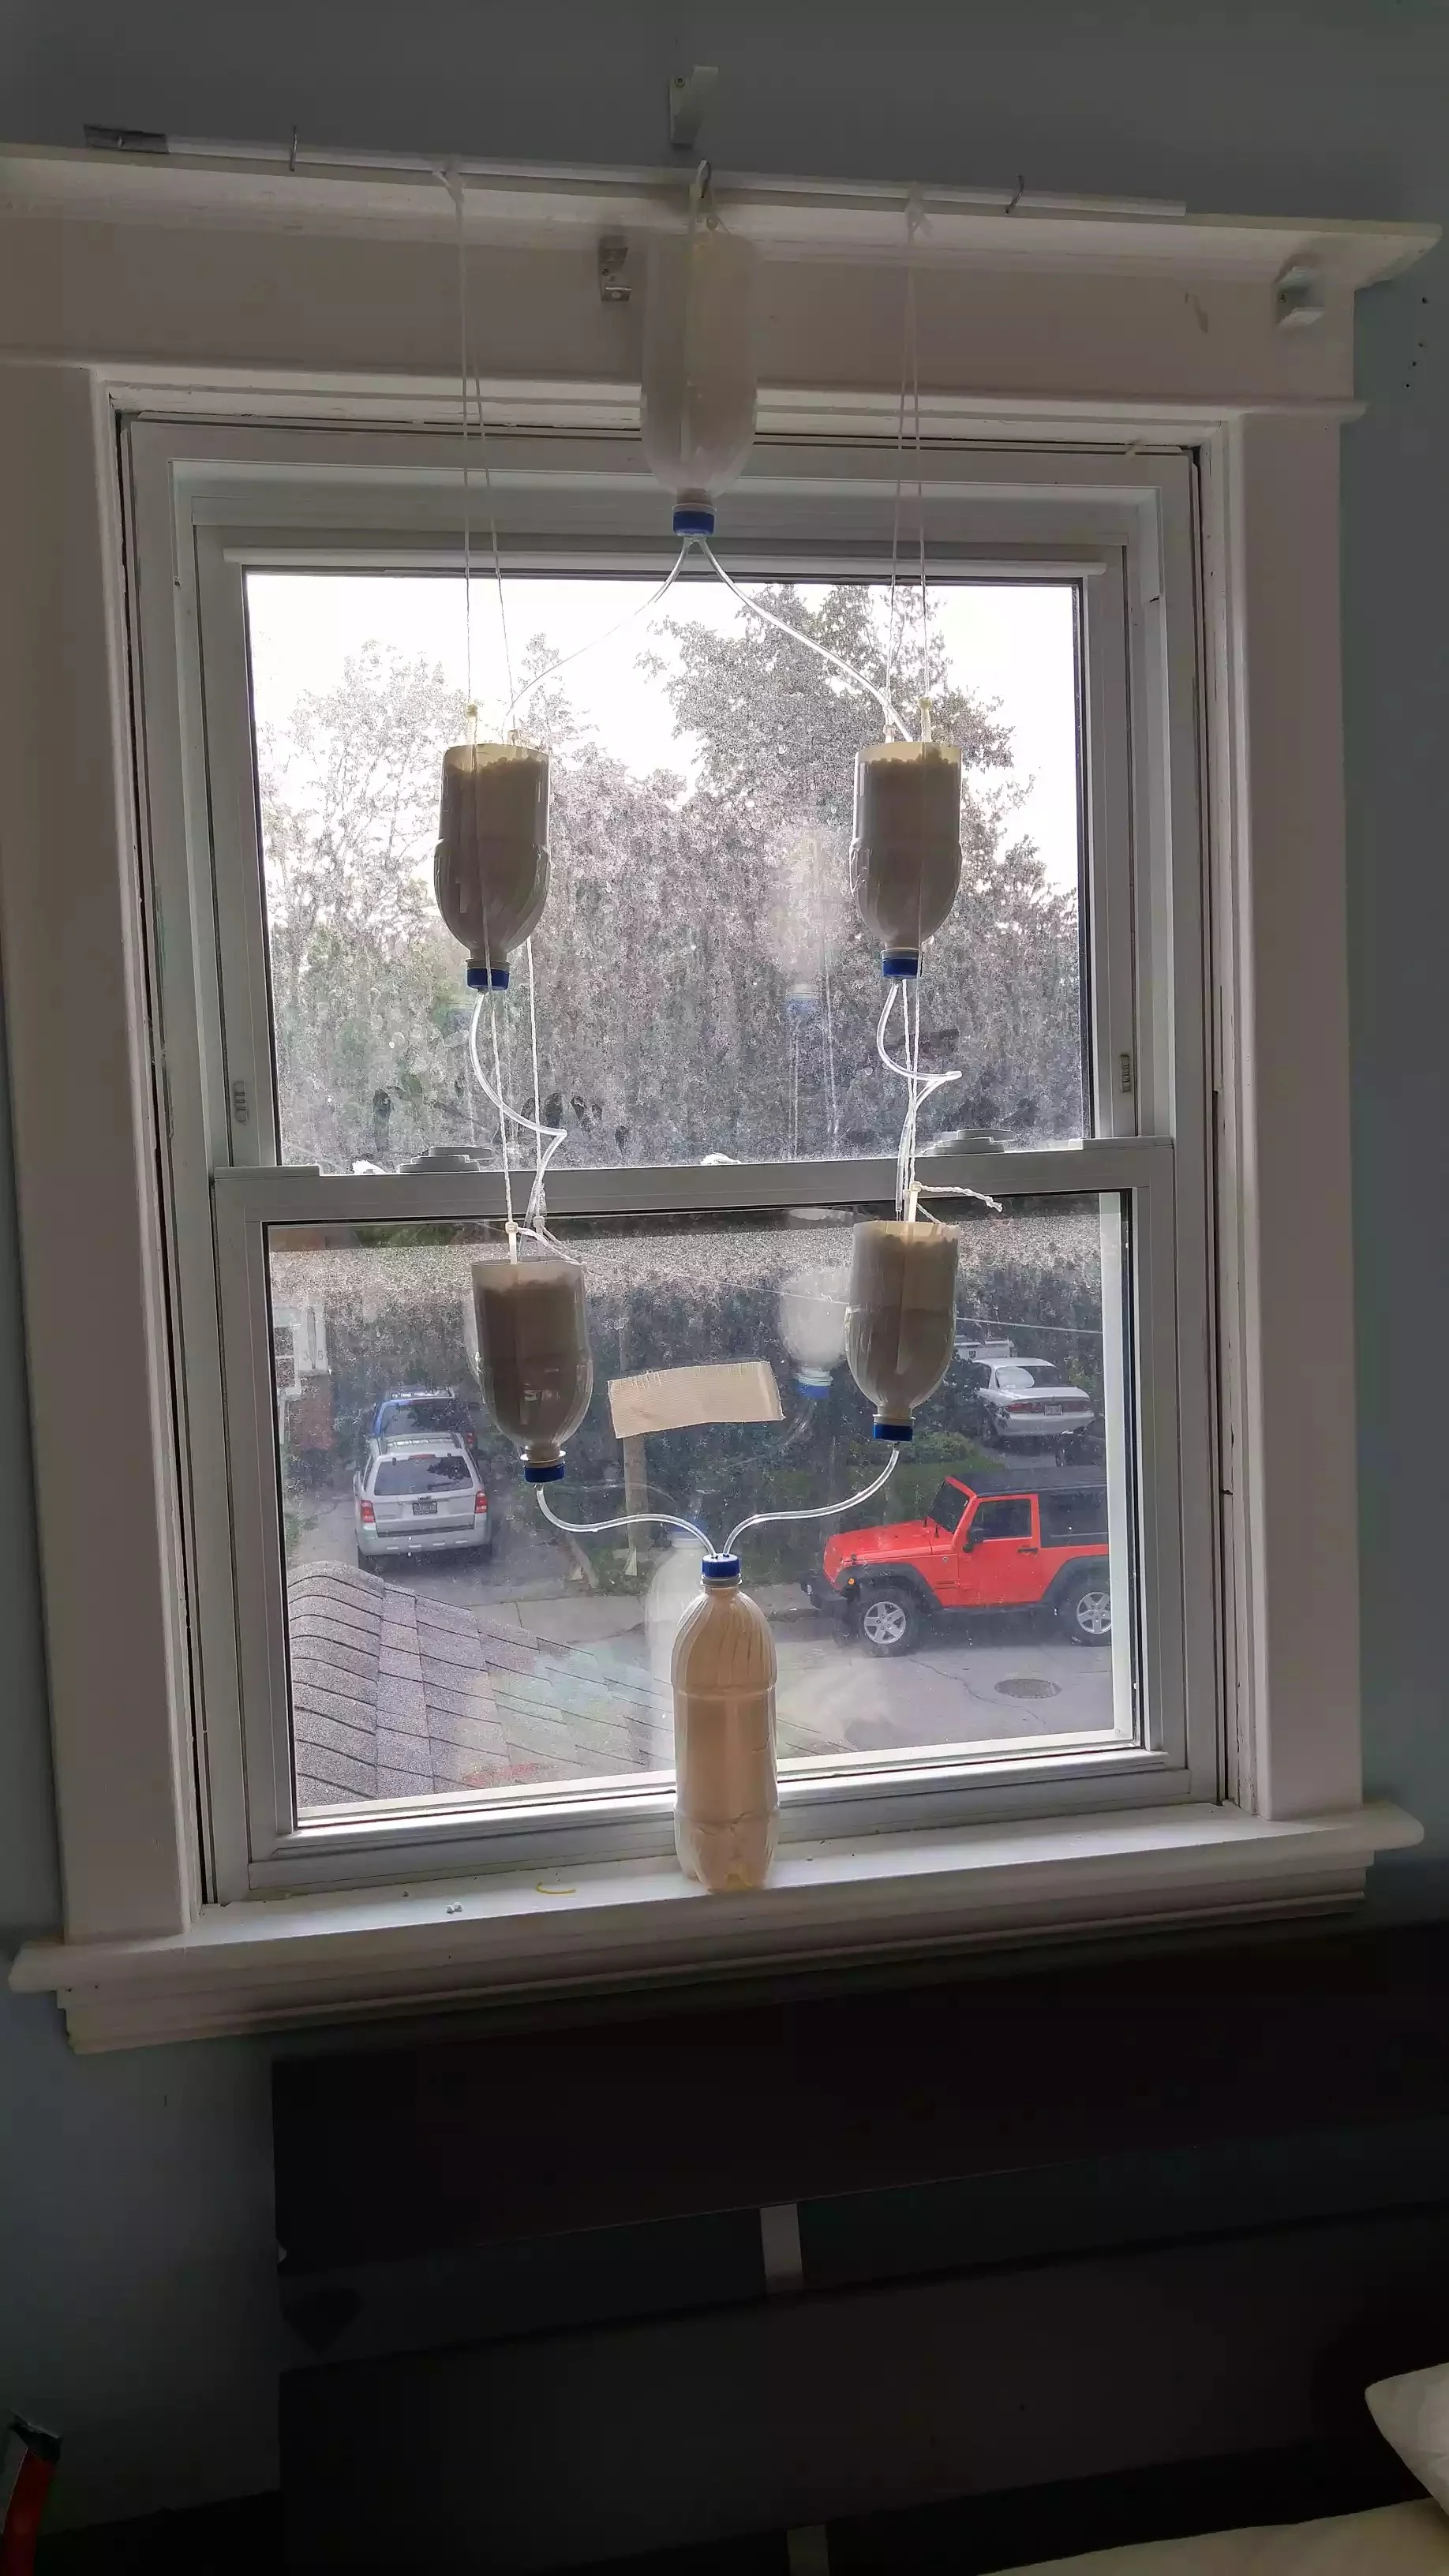
One flower pot is connected to the one below it such that the excess run off from one pot waters the one below. The water is pumped up to the first pot using an airlift pump (a Venturi pump).
An illustration of how the pump work is shown in the figure below, reproduced from the Shadow Oaks Hydroponics
Source: https://sohydroponics.wordpress.com/
The caveat here though, which takes an annoylingly long time to set up, is the head between the "water IN" and "water/air OUT" needs to be significantly above the "air-IN". I know this is hard to understand and I am doing a poor job explaining it, I would implore you to view the following video
In the above video we can see the path that water travels. Note the orange check valves in line with the pump, this increases the required pressure to backflow water into the pump (effectively limited flow to one direction).
The equilibrium point that the water wants to rest is above where air get injected. As air is pumped through, the natural buoyancy of the air brings water with it up the tube. This type of pump is extremely efficient and very low power.
Construction
I will not be doing a step by step of the process unfortunately. Email me and I will gladly help your project!
I went to dollarama and bought a bunch of Pepsi bottles to use as flower pots and I spray painted them white to limit algae growth. I used aquarium air pump tube and I bought the pump that had the best pressure to cost ratio. I purchased check valves and T-joints for setting up the airlift pump system. I basically Amazon'd everthing.
The pots themselves used no soil. I used perlite (not to be confused with the phase of steel, pearlite) which is some sort of porous ceramic material. I laced the water with nutrients and we were good to go!
To distribute water more evenly I made a ring and chopped up small tubes I took from the inside of pens and lollipop sticks.
As you can see in the above photo, it was suspended with string and I used zip ties to hold the string. Zip ties are nice because it gives you flexibility in where you want to place the pots.
I made a big mistake with choosing perlite as my only substrate. When the plants are small, their roots are very tiny. The pores in the large grained perlite is quite large and the abundance of air pockets led to root rot. I was so dead set on avoiding soil since I wanted the only nutrient intake to be from my nutrient water I made my like very difficult.
To automate watering cycles, I bought an automatic timer that will turn on and off the pump every few hours and let it run for about 10 minutes. I purchased one on Amazon that uses BlueTooth so it can be paired with a phone. Although it is a cool novelty, they are prone to breaking. My first one died so I ordered a WiFi connected one which is extremely glitchy but does still work. All in all I would recommend the cheap old ones (are they mechanical?) people use in their homes to turn on and off lamps.
In the end the plants were not growing as fast as I wanted them to, and by this point I started my algae photobioreactor, so I removed the plants to create more room for the algae. Checkout my Spirulina Photobioreactor blog post to see how I used my window space for that project!


